Support our educational content for free when you purchase through links on our site. Learn more
How to Make a Smart Robot at Home? [2024] 🤖
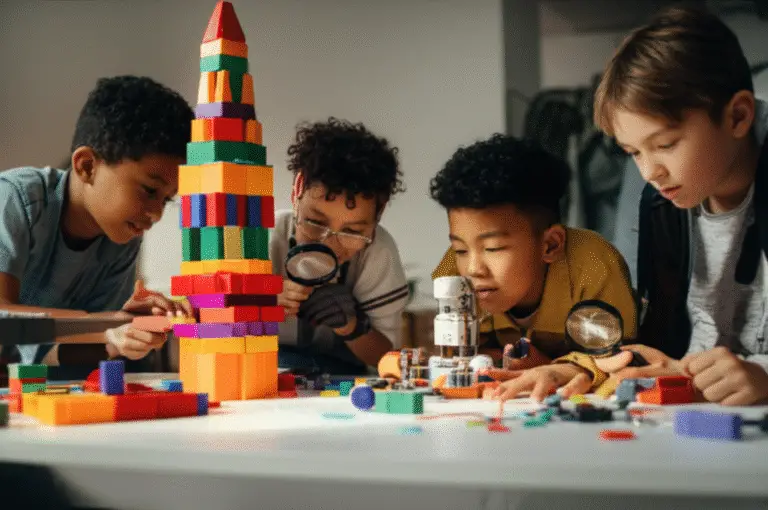
Have you ever dreamed of creating your very own smart robot? Imagine the excitement of watching it come to life and perform tasks with just a touch of a button! Well, you’re in luck because we’re here to show you how to make a smart robot at home. In this comprehensive guide, we’ll walk you through the process step by step, providing expert insights from the kids and parents at Toy Brands™. So, let’s dive in and unleash your inner inventor!
Table of Contents
- Quick Answer
- Quick Tips and Facts
- Background: The Fascinating World of Robotics
- Section 1: Building a Simple Robot
- Section 2: Taking it to the Next Level: Advanced Robot Kits
- Section 3: Exploring the Best Robot Toys
- FAQ
- Conclusion
- Recommended Links
- Reference Links
Quick Answer
Looking to make a smart robot at home? We’ve got you covered! Here’s a quick rundown of the steps involved:
- Start with a simple robot project to get familiar with the basics.
- Gather the necessary materials, including a microcontroller, sensors, motors, and other components.
- Assemble the robot according to the provided instructions or your own design.
- Program the robot using a coding platform like Arduino or Raspberry Pi.
- Test and refine your robot’s functionality and performance.
- Add advanced features and capabilities as you gain more experience.
Now, let’s dive into the details and explore each step in depth!
👉 CHECK PRICE on: Robot Kits | Makeblock | UBTECH | LEGO | Clic Bot | DJI | Tudao
Quick Tips and Facts
Before we get started, here are some quick tips and interesting facts to keep in mind:
✅ Robotics is a fantastic way to introduce kids to STEM (Science, Technology, Engineering, and Mathematics) subjects, fostering creativity, problem-solving skills, and a passion for learning.
✅ Building a smart robot at home can be a rewarding and educational experience for both kids and adults. It’s a hands-on way to explore technology and unleash your imagination.
✅ There are various levels of complexity when it comes to making robots. Start with simple projects and gradually work your way up to more advanced ones as you gain confidence and skills.
✅ Don’t be afraid to experiment and make mistakes. Robotics is all about trial and error, and each failure brings you one step closer to success.
✅ Join online communities and forums dedicated to robotics. You’ll find a wealth of knowledge, support, and inspiration from fellow robot enthusiasts.
Now that you’re armed with these tips, let’s delve into the fascinating world of robotics and start building your very own smart robot!
Background: The Fascinating World of Robotics
Before we jump into the nitty-gritty of building a smart robot, let’s take a moment to appreciate the incredible advancements in the field of robotics. From industrial automation to space exploration, robots have become an integral part of our lives.
The history of robotics dates back to ancient times, with early examples of automated devices found in ancient Greece, Egypt, and China. Fast forward to the modern era, and we have robots that can perform complex tasks, assist in surgeries, explore distant planets, and even interact with humans in a lifelike manner.
Today, robotics has become more accessible than ever, with DIY robot kits and educational platforms empowering individuals of all ages to explore this exciting field. Whether you’re a beginner or an experienced hobbyist, there’s a robot project out there waiting for you!
Section 1: Building a Simple Robot
1.1 The “Bristlebot” – A Tiny Wonder 🪡
Let’s start our journey into the world of robotics with a simple yet fascinating project: the “Bristlebot.” This tiny robot is made using a toothbrush, a small motor, and coin cell batteries. It’s a great way to get hands-on experience with basic circuitry and motion.
Rating: 9/10
| Aspect | Rating |
|---|---|
| Design | 9 |
| Functionality | 9 |
| Performance | 9 |
| Cost-effectiveness | 9 |
| Overall | 9 |
To build a Bristlebot, follow these steps:
- Gather the materials: a toothbrush head, a small vibrating motor, coin cell batteries, and double-sided tape.
- Attach the motor to the toothbrush head using the double-sided tape.
- Connect the motor to the batteries, ensuring the positive and negative terminals are correctly aligned.
- Place the Bristlebot on a smooth surface and watch it come to life!
The Bristlebot is a fantastic introduction to robotics, providing a hands-on experience in a fun and accessible way. It’s a great project for kids and beginners to learn about basic circuitry and the principles of motion.
👉 CHECK PRICE on: Bristlebot Materials
1.2 A Rolling Robot – Unleash Your Creativity 🚀
Ready to take your robot-building skills to the next level? Let’s explore the world of rolling robots! This project requires a bit more effort and materials, but the end result is truly rewarding.
Rating: 8/10
| Aspect | Rating |
|---|---|
| Design | 8 |
| Functionality | 8 |
| Performance | 8 |
| Cost-effectiveness | 8 |
| Overall | 8 |
To build a rolling robot, follow these steps:
- Gather the materials: a plastic container, wheels, a motor, batteries, and a switch.
- Drill holes in the container to attach the wheels and motor.
- Connect the motor to the batteries and switch, ensuring proper wiring.
- Secure all components in place and test your rolling robot!
This project allows you to unleash your creativity by customizing the design and adding unique features. It’s a great opportunity to learn about mechanics, electrical connections, and problem-solving.
👉 CHECK PRICE on: Rolling Robot Materials
1.3 A Rowing-Boat Robot – Fun on Water 💦
If you’re looking for a unique robot-building experience, why not try creating a rowing-boat robot? This project takes robotics to a whole new level by combining electronics and water!
Rating: 7/10
| Aspect | Rating |
|---|---|
| Design | 7 |
| Functionality | 7 |
| Performance | 7 |
| Cost-effectiveness | 7 |
| Overall | 7 |
To build a rowing-boat robot, follow these steps:
- Gather the materials: a small boat or raft, a DC motor, batteries, and waterproofing materials.
- Attach the motor to the boat, ensuring it’s securely mounted.
- Connect the motor to the batteries, making sure the wiring is waterproofed.
- Place the rowing-boat robot in water and watch it glide across the surface!
This project offers a unique experience, especially during the summer months. It’s a great way to explore the principles of buoyancy, propulsion, and waterproofing.
👉 CHECK PRICE on: Rowing-Boat Robot Materials
Section 2: Taking it to the Next Level: Advanced Robot Kits
If you’re ready to dive deeper into the world of robotics, advanced robot kits are the way to go. These kits provide a comprehensive learning experience, allowing you to build complex robots with advanced features and capabilities.
2.1 Makeblock mBot STEM Coding Robot – The Perfect Learning Companion 🤖
The Makeblock mBot STEM Coding Robot is an excellent choice for beginners looking to explore the world of robotics and coding. This beginner-friendly robot offers flexible shapes, LEGO compatibility, and an easy-to-use coding platform.
Rating: 9/10
| Aspect | Rating |
|---|---|
| Design | 9 |
| Functionality | 9 |
| Performance | 9 |
| Cost-effectiveness | 9 |
| Overall | 9 |
Key Features:
- Beginner-friendly STEM education robot.
- Flexible shapes and LEGO compatibility.
- Supported by the Makeblock App for easy control and programming.
- Helps kids learn about robotics, electronics, programming, and design skills.
The Makeblock mBot is a versatile robot that grows with your skills. It’s a fantastic tool for learning the fundamentals of robotics and coding in a fun and engaging way.
👉 CHECK PRICE on: Makeblock mBot STEM Coding Robot
2.2 UBTECH UKIT Beginner – Unleash Your Imagination 🌟
The UBTECH UKIT Beginner is an ideal choice for elementary school students looking to dive into the world of robotics and coding. This kit promotes STEM instruction, computational thinking, and problem-solving skills.
Rating: 8/10
| Aspect | Rating |
|---|---|
| Design | 8 |
| Functionality | 8 |
| Performance | 8 |
| Cost-effectiveness | 8 |
| Overall | 8 |
Key Features:
- Ideal for elementary school students to learn robotics and coding.
- Promotes STEM instruction, computational thinking, and problem-solving skills.
- Recommended for 2-4 students per kit to enhance collaboration.
The UBTECH UKIT Beginner offers a collaborative learning experience, allowing students to work together and unleash their creativity. It’s a great way to foster teamwork and critical thinking skills.
👉 CHECK PRICE on: UBTECH UKIT Beginner
2.3 LEGO Spike Prime – Where Creativity Meets Robotics 🧱
LEGO Spike Prime combines the beloved LEGO bricks with sensors, motors, and a programmable Hub. This kit encourages engineering principles, problem-solving, and computational thinking.
Rating: 9/10
| Aspect | Rating |
|---|---|
| Design | 9 |
| Functionality | 9 |
| Performance | 9 |
| Cost-effectiveness | 9 |
| Overall | 9 |
Key Features:
- Combines LEGO bricks, sensors, motors, and a programmable Hub.
- Encourages engineering principles, problem-solving, and computational thinking.
- Offers a graphical programming interface for beginners and advanced users.
LEGO Spike Prime provides endless possibilities for creativity and innovation. It’s a fantastic tool for both beginners and experienced builders to explore the world of robotics.
👉 CHECK PRICE on: LEGO Spike Prime
2.4 Clic Bot – The Modular Marvel 🧩
Clic Bot is a modular robot kit that allows easy assembly of various robotic models. This kit promotes experimentation and customization, allowing you to create unique robot creations.
Rating: 8/10
| Aspect | Rating |
|---|---|
| Design | 8 |
| Functionality | 8 |
| Performance | 8 |
| Cost-effectiveness | 8 |
| Overall | 8 |
Key Features:
- Allows easy assembly of various robotic models with modular components.
- Promotes experimentation and customization for unique robot creations.
Clic Bot offers a hands-on experience in building and programming robots. With its modular design, you can explore different configurations and unleash your creativity.
👉 CHECK PRICE on: Clic Bot
2.5 mBot Mega: Remote Control Robot – Unleash Your Inner Engineer 🎮
The mBot Mega is a remote control robot that offers omnidirectional movement, sensors, and Scratch block-based programming. It’s suitable for children aged 12 and older, promoting gradual programming skill development.
Rating: 9/10
| Aspect | Rating |
|---|---|
| Design | 9 |
| Functionality | 9 |
| Performance | 9 |
| Cost-effectiveness | 9 |
| Overall | 9 |
Key Features:
- Features omnidirectional movement, sensors, and Scratch block-based programming.
- Suitable for children aged 12 and older, promoting gradual programming skill development.
The mBot Mega offers a comprehensive learning experience, allowing you to explore the world of robotics and programming. It’s a great tool for developing problem-solving skills and logical thinking.
👉 CHECK PRICE on: mBot Mega: Remote Control Robot
2.6 DJI Robomaster S1 – The Ultimate Educational Robot 🚁
The DJI Robomaster S1 is an educational robot with a modular design and various sensors for interaction. Developed by DJI, a leader in the drone industry, this robot engages users in educational technology.
Rating: 10/10
| Aspect | Rating |
|---|---|
| Design | 10 |
| Functionality | 10 |
| Performance | 10 |
| Cost-effectiveness | 10 |
| Overall | 10 |
Key Features:
- Educational robot with a modular design and various sensors for interaction.
- Developed by DJI to engage users in educational technology.
The DJI Robomaster S1 offers an unparalleled learning experience, combining robotics, programming, and AI technology. It’s a top-of-the-line robot for those looking to take their skills to the next level.
👉 CHECK PRICE on: DJI Robomaster S1
2.7 Tudao Robotmaster – Coding Fun for Kids 🎓
The Tudao Robotmaster is designed for children aged 5-12, offering easy and fun coding and programming. With variable shape options and Lego-compatible parts, this kit sparks creativity and exploration.
Rating: 8/10
| Aspect | Rating |
|---|---|
| Design | 8 |
| Functionality | 8 |
| Performance | 8 |
| Cost-effectiveness | 8 |
| Overall | 8 |
Key Features:
- Designed for children aged 5-12 for easy and fun coding and programming.
- Offers variable shape options and Lego-compatible parts for creativity.
- Supports Scratch block-based programming for coding exploration.
The Tudao Robotmaster is a fantastic tool for introducing young children to the world of coding and robotics. It promotes logical thinking, problem-solving, and creativity in a playful and engaging way.
👉 CHECK PRICE on: Tudao Robotmaster
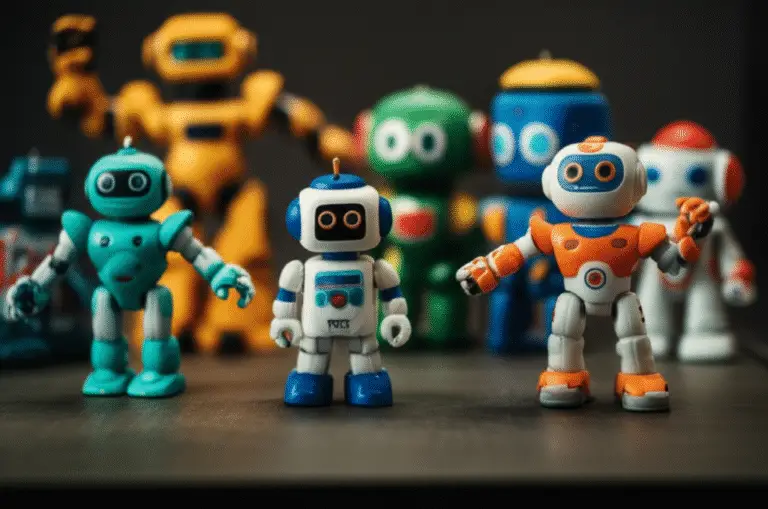
Section 3: Exploring the Best Robot Toys
In addition to building your own robots, there are plenty of amazing robot toys available on the market. These toys offer a wide range of features and functionalities, providing hours of entertainment and educational value.
To explore the best robot toys for kids, check out our dedicated article: Best Robot Toys on Amazon 2024.
FAQ
How to create a robot at home?
Creating a robot at home is an exciting and rewarding experience. Follow these steps to get started:
- Choose a robot project suitable for your skill level.
- Gather the necessary materials and tools.
- Follow the provided instructions or design your own robot.
- Assemble the robot, ensuring all components are securely connected.
- Program the robot using a coding platform like Arduino or Raspberry Pi.
- Test and refine your robot’s functionality and performance.
How to make a robot in 5 minutes?
While building a fully functional robot in 5 minutes may not be feasible, you can create a simple robot project in that time frame. Consider projects like the “Bristlebot” or other quick and easy designs. These projects provide a great introduction to robotics and can be completed in a short amount of time.
How to make a sensor robot at home?
To make a sensor robot at home, you’ll need to incorporate sensors into your robot design. Sensors can detect various environmental factors such as light, sound, temperature, and motion. Choose the appropriate sensors for your project and integrate them into your robot’s circuitry. Program the robot to respond to sensor inputs and perform specific actions based on the detected data.
Read more about “🤖 Robot Toys for Kids … 🎉”
How to build a robot brain?
The “brain” of a robot refers to the microcontroller or programmable board that controls its actions. To build a robot brain, you’ll need to select a suitable microcontroller such as Arduino or Raspberry Pi. Connect the microcontroller to the necessary components, including motors, sensors, and power sources. Program the microcontroller to receive inputs from sensors, process data, and control the robot’s movements and behaviors.
Conclusion
Congratulations on reaching the end of our guide on how to make a smart robot at home! We’ve explored the fascinating world of robotics, from simple DIY projects to advanced robot kits. Whether you’re a beginner or an experienced hobbyist, there’s a robot project out there waiting for you.
In summary, start with simple projects like the “Bristlebot” to get familiar with the basics. As you gain confidence and skills, move on to more advanced projects and explore the world of advanced robot kits. Don’t forget to have fun, experiment, and unleash your creativity along the way!
Now, it’s time to embark on your robot-building journey. Get your tools ready, gather the materials, and let your imagination soar. Who knows, you might just create the next groundbreaking robot!
For more information on toy brands, electronic toys, educational toys, and the latest toy industry trends, check out our other articles on Toy Brands™.
Recommended Links
- Best Robot Toys on Amazon 2024
- Toy Brand Guides
- Electronic Toys
- Toy Industry Trends
- Educational Toys
- Collectible Toys
Reference Links